Classic Heathkit OL-1 Scope Gets Some TLC

These days, not only are oscilloscopes very common, but even a cheap instrument today would have been the envy of the world’s greatest labs not that long ago. But back in the day, the home experimenter basically had two choices: buy a surplus scope that a big company was getting rid of or build a Heathkit. [Radiotvphononut] bought an old Heathkit OL-1 scope at an estate sale and set about putting it back in service.

If you are used to a modern scope, you’ll be amazed at how simple a scope like this can be. A handful of tubes and a CRT is the bulk of it. Of course, the OL-1 is an analog scope with a 400 kHz bandwidth. It did, however, have two channels, which was a rarity at the time.

The OL-1 was sold for a few years up to 1956 and cost about $30 as a kit. There was a version with a larger screen (five whole inches) that cost an extra $40, so you can bet there were more OL-1s sold since $40 was a big ask in 1956. While they don’t seem like much today, you were probably the envy of the ham club in 1956 when you lugged this in for show and tell.

This is a long video, but it pays off at the end. Overall, this was a more capable scope than the $66 scope from 10 years earlier we looked at. Did you ever wonder how people visualized signals before the CRT? Funny, we did too.

Continue reading “Classic Heathkit OL-1 Scope Gets Some TLC”

Heathkit Signal Generator Gets An Update

[DTSS_Smudge] correctly intuits that if you are interested in an old Heathkit signal generator, you probably already know how to solder. So, in a recent video, he focused on the components he decided to update for safety and other reasons. Meanwhile, we get treated to a nice teardown of this iconic piece of test gear.

If you didn’t grow up in the 1960s, it seems strange that the device has a polarized line cord with one end connected to the chassis. But that used to be quite common, just like kids didn’t wear helmets on bikes in those days.

A lot of TVs were “hot chassis” back then, too. We were always taught to touch the chassis with the back of your hand first. That way, if you get a shock, the associated muscle contraction will pull your hand away from the electricity. Touching it normally will make you grip the offending chassis hard, and you probably won’t be able to let go until someone kindly pulls the plug or a fuse blows.

These signal generators were very common back in the day. A lot of Heathkit gear was very serviceable and more affordable than the commercial alternatives. In 1970, these cost about $32 as a kit or $60 already built. While $32 doesn’t sound like much, it is equivalent to $260 today, so not an impulse buy.

Some of the parts are simply irreplaceable. The variable capacitor would be tough to source since it is a special type. The coils would also be tough to find replacements, although you might have luck rewinding them if it were necessary.

We are spoiled today with so many cheap quality instruments available. However, there was something satisfying about building your own gear and it certainly helped if you ever had to fix it.

There was so much Heathkit gear around that even though they’ve been gone for years, you still see quite a few units in use. Not all of their gear had tubes, but some of our favorite ones did.

Steel Reinforcement Toughens Cracked Vintage Knobs

Nothing can ruin a restoration project faster than broken knobs. Sure, that old “boat anchor” ham rig will work just fine with some modern knobs, but few and far between are the vintage electronics buffs that will settle for such aesthetic affrontery. But with new old stock knobs commanding dear prices, what’s the budget-conscious restorationist to do? Why, fix the cracked knobs yourself, of course.

At least that’s what [Level UP EE Lab] tried with his vintage Heahkit DX60 ham transmitter, with pretty impressive results. The knobs on this early-60s radio had all cracked thanks to years of over-tightening the set screws. To strengthen the knobs, he found some shaft collars with a 1/4″ inside diameter and an appropriate set screw. The backside of the knob was milled out to make room for the insert, which was then glued firmly in place with everyone’s go-to adhesive, JB Weld. [Level UP] chose the “Plastibonder” product, which turns out not to be an epoxy but rather a two-part urethane resin, which despite some initial difficulties flowed nicely around the shaft collar and filled the milled-out space inside the knob. The resin also flowed into the channels milled into the outside diameter of the shaft collars, which are intended to grip the hardened resin better and prevent future knob spinning.

It’s a pretty straightforward repair if a bit fussy, but the result is knobs that perfectly match the radio and still have the patina of 60-plus years of use. We’ll keep this technique in mind for our next restoration, or even just an everyday repair. Of course, for less demanding applications, there are always 3D printed knobs.

Continue reading “Steel Reinforcement Toughens Cracked Vintage Knobs”

Voice Control For A Vintage Heathkit Radio

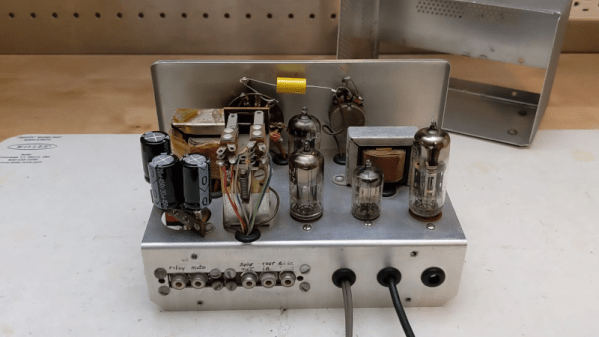
Most modern ham rigs have a voice activated transmission (VOX) mode, although we don’t know many people who use it often. When a transmitter is in VOX mode, it starts transmitting when you talk, and then, when you pause for a second or two, the transmitter turns off. Many old ham transmitters, though, didn’t support VOX, so Heathkit sold the VX-1 “electronic voice control” to add VOX to older transmitters. [Jeff Tranter] shows us inside a clean-looking unit.

These devices were sold from 1958 to 1960 and used tubes and a selenium rectifier. The device is connected between the microphone and the transmitter. It also sat between the receiver and the speaker to mute audio while transmitting. The original unit had a screw terminal to connect to the outside world, and some of the screws had live line voltage on them. The unit [Jeff] examines is modified to have phono jacks along with a few other repairs.

The wiring looks like a tube radio. Tubes are above the chassis, and point-to-point wiring is underneath. There is also an unusual sealed selenium rectifier. [Jeff] shows how the device works using just a receiver. A few minor repairs were needed.

If you are interested in getting your ham license, most modern radios support VOX out of the box — no rhyme intended. We do, however, love that old Heathkit gear.

Continue reading “Voice Control For A Vintage Heathkit Radio”

A Dusty Boat Anchor Back From The Brink

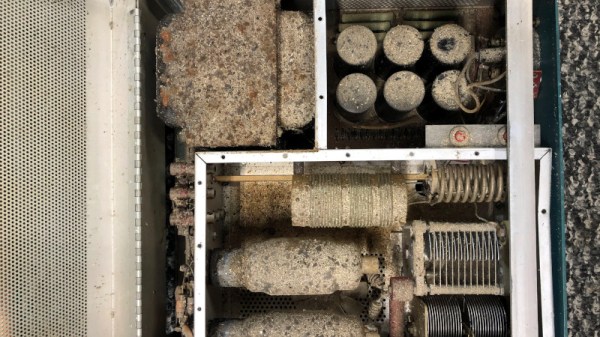
Many of us will have found dusty forgotten pieces of electronics and nursed them back to health, but we were captivated by [Don]’s tale of electronic revival. Instead of perhaps a forgotten computer or television, his barn find was a Heathkit linear amplifier for radio amateurs. In that huge box underneath an impressive layer of grime were a pair of huge tubes, along with all the power supply components to give them the 2 kV they need. It should have been good for a kilowatt when new, can it be made to go on air again?

Perhaps understandably with such an old device, after cleaning away the dust of ages he replaced the power supply circuitry with new parts and PCBs. A linear amplifier is surprisingly simple, but because of the voltages and power concerned there’s a need to treat its power circuits with respect. On first power-up the filaments work and the rails come up, so when given some RF drive it comes alive. Coupled with a case restoration you’d never know how dreadful a state it had been in.

We like to see classic Heathkit devices here at Hackaday, though we’ve followed their more recent reappearance too.

Magnetic Bubble Memory Brought To Life On Heathkit

There are all kinds of technology that appear through the ages that find immediate success, promise to revolutionize the world, but fade to obscurity almost as quickly. Things like the ZIP disk, RDRAM, the digital compact cassette, or even Nintendo’s VirtualBoy. Going even further back in time [smbaker] is taking a look a bubble memory, a technology that was so fast and cost-effective for its time that it could have been used as “universal” memory, combining storage and random-access memory into a single unit, but eventually other technological developments overshadowed its quirks.

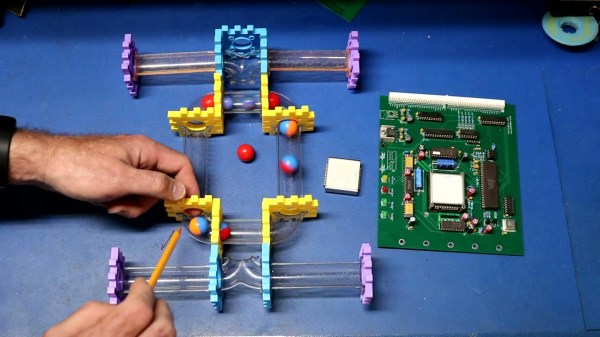
[smbaker] is placing his magnetic bubble memory module to work in a Heathkit H8, an Intel 8080-based microcomputer from the the late 70s. The video goes into great detail on the theory of how these devices used moving “bubbles” of magnetism to store information and how these specific devices work before demonstrating the design and construction of a dedicated support card which hosts the module itself along with all of the necessary circuitry to allow it to communicate with the computer. From there he demonstrates booting the device using the bubble memory and performs several write and read actions using the module as a demonstration.

Eventually other technologies such as solid-state RAM and various hard disk drives caused the obsolescence of this technology, but it did hang on for a bit longer in industrial settings due to its ability to handle high vibrations and mechanical shocks, mostly thanks to the fact that they had no moving parts. Eventually things like Flash memory came around to put the final nail in the coffin for these types of memory modules, though. The Heathkit H8 is still a popular computer for retrocomputing enthusiasts nonetheless, and we’ve seen all kinds of different memory modules put to work in computers like these.

Continue reading “Magnetic Bubble Memory Brought To Life On Heathkit”

Retro Gadgets: Make Your Scope Dual Channel

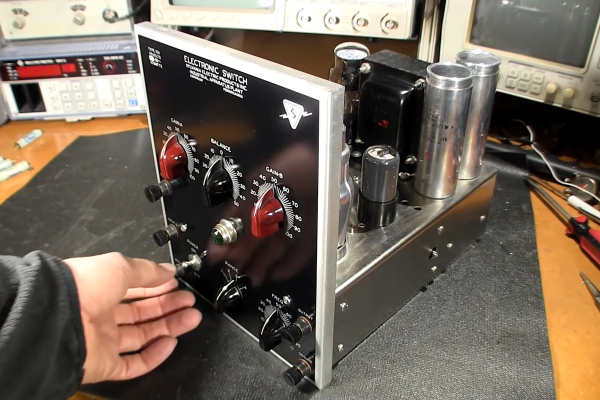
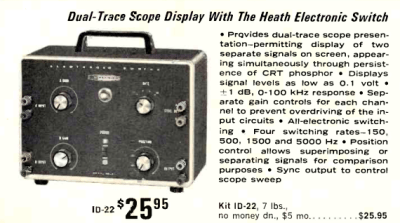
We live in a time when having an oscilloscope is only a minor luxury. But for many decades, a good scope was a major expense, and almost no hobbyist had a brand new one unless it was of very poor quality. Scopes were big and heavy and, at the price most people were willing to pay, only had a single channel. Granted, having one channel is better than having nothing. But if the relative benefit of having a single channel scope is 10 points, the benefit of having two channels is easily at least 100 points. So what was a poor hacker to do when a dual-trace or higher scope cost too much? Why, hack, of course. There were many designs that would convert a single trace scope into a poor-quality multichannel scope. Heathkit made several of these over the years like the ID-22, the ID-101, and the ID-4101. They called them “electronic switches.” The S-2 and S-3 were even earlier models, but the idea wasn’t unique to Heathkit and had been around for some time.

For $25, you could change your scope to dual trace!

There were two common approaches. With alternative or alt mode, you could trigger a sync pulse and draw one trace. Then trigger again and draw the second trace with a fixed voltage offset. If you do this fast enough, it looks like there are two traces on the screen at one time. The other way is to rapidly switch between voltages during the sweep and use the scope’s Z input to blank the trace when it is between signals. This requires a Z input, of course, and a fast switching clock. This is sometimes called “chopper mode” or, simply, chop. This wasn’t just the realm of adapters, though. Even “real” analog scopes that did dual channels used the same methods, although generally with the benefit of being integrated with the scope’s electronics.

Continue reading “Retro Gadgets: Make Your Scope Dual Channel”