A Nerf Gun Upgrade

A lot of us have nostalgia for our childhood toys, and as long as they’re not something like lawn darts that nostalgia often leads to fun upgrades since some of us are adults with industrial-sized air compressors. Classics like Super Soakers and Nerf guns are especially popular targets for improvements, and this Nerf machine gun from [Emiel] is no exception.

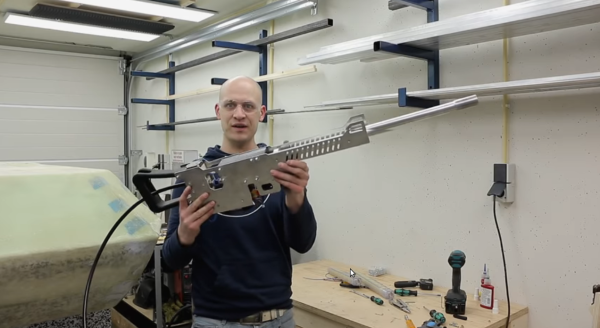
The build takes a Nerf ball-firing toy weapon and basically tosses it all out of the window in favor of a custom Nerf ball launching rifle. He starts with the lower receiver and machines a pneumatic mechanism that both loads a ball into the chamber and then launches it. This allows the rifle to be used in both single-shot mode and also in fully-automatic mode. From there, a barrel is fashioned along with the stock and other finishing touches.

[Emiel] also uses a high-speed camera to determine the speed of his new Nerf gun but unfortunately it isn’t high-speed enough, suffering from the same fate as one of the fastest man-made objects ever made, and he only has a lower bound on the speed at 400 km/h. If you don’t want to go fast with your Nerf builds, though, perhaps you should build something enormous instead. Continue reading “A Nerf Gun Upgrade”

An E-Book Reader, But Just For Haiku

E-ink displays haven’t revolutionized the world so much as served us humbly in e-book readers such as the Kindle and its ilk. Most such readers are designed for extended sessions reading novels and the like, but [Roni Bandini] decided a haiku-sized device was in order. 

The diminutive device runs off an ESP32, which has plenty of clock cycles for easily driving displays. It’s paired with a 2.9 inch Waveshare e-ink display, upon which it delivers poetry in the popular Japanese haiku format – 5 syllables, 7 syllables, 5 syllables. Writing to the display is easy with the GxEPD library, which is compatible with a variety of common e-ink displays. Presently the poetry is hardcoded in the program, and there’s plenty that could be included with the ESP32’s roomy program storage. However, [Roni] notes it would be simple to have the reader pull poems from an SD card instead.

It’s a fun project, and a great way to get familiar with the basics of working with e-ink displays. We’d love to see a WiFi-enabled version that pulls down the hottest daily haikus fresh from the web, too. Funnily enough, our own archives only feature one other reference to the famous Japanese art, which has little to do with poetry. If you fancy changing that, make something relevant and drop us a line. Video after the break.

Continue reading “An E-Book Reader, But Just For Haiku”

Slim Sypherdeck Skips The Keyboard, Packs X86 CPU

There are few hard and fast rules in the world of custom cyberdecks, but many of these bespoke machines do share a certain level of commonality. They generally use a low-power ARM board such as the Raspberry Pi that doesn’t consume much power or require any exotic thermal management, and a large mechanical keyboard is almost a given. But at a glance, it’s clear that [Daan Gerits] wasn’t concerned with the status quo when designing the Sypherdeck.

Now to be fair, dropping the ARM single-board computer for x86 isn’t completely unheard of. But those builds tend to be considerably bulkier than the Sypherdeck. The secret here seems to be that the 3D printed enclosure doesn’t hold much else than the LattePanda and a seven inch LCD touch screen. The hatch on the side covers the rear of the power, USB, and HDMI bulkhead connectors, but it looks like there’s enough room in there to squeeze in a bit of custom electronics should you wish. There’s no obvious place to install any batteries, so if you wanted to take the show on the road, you’ll need to use an external pack.

Continue reading “Slim Sypherdeck Skips The Keyboard, Packs X86 CPU”

Laser Galvos And An ESP32 Recreate Old-School Asteroids

Playing Asteroids now isn’t quite what it used to be when it came out 40 years ago. At the time, the vector-scan display was part of the charm; making do with an emulator running on a traditional raster display just doesn’t quite do it for purists. But if you manage to build your own laser-projector version of the game like [Chris G] did, you’re getting close to capturing some of the original magic of the game.

There’s a lot to unpack about this project, and the video below does a good job explaining it. Where the original game used a beam of electrons flashing inside a CRT to trace out each object in the game, [Chris] substituted an off-the-shelf two-axis galvanometer from eBay and a 5-mW laser LED. This can project a gamefield on a wall up to two meters on a side, far bigger than any version of the machine ever built. The galvos are driven by op-amp drivers and an SPI DAC on a custom PCB. And in comparison to the discrete logic chips and 6502 running the original game, [Chris] opted for an ESP32.

As interesting as the hardware for this is, the real story is in the software. [Chris] does an excellent job running through his design, making the bulk of the video feel like a master class in game programming. His software is from scratch — no emulations here. As such it doesn’t perfectly reproduce the original games — no flying saucers and no spaceship explosion animations (yet) — but when coupled with the laser vector display, it certainly captures the feel of the original.

Being devoted Asteroids fans from back in the day, this one really pushes our buttons. We’ve seen laser-based recreations of the game before, but this one makes us think we can finally afford to recapture the glory of our misspent youth.

Continue reading “Laser Galvos And An ESP32 Recreate Old-School Asteroids”

Dynamic Macro Keyboard Controls All The Things

Keyboard shortcuts are great. Even so, a person can only be expected to remember so many shortcuts and hit them accurately while giving a presentation over Zoom. [Sebastian] needed a good set of of shortcuts for OBS and decided to make a macro keyboard to help out. By the time he was finished, [Sebastian] had macro’d all the things and built a beautiful and smart peripheral that anyone with a pulse would likely love to have gracing their desk.

The design started with OBS, but this slick little keyboard turned into a system-wide assistant. It assigns the eight keys dynamically based on the program that has focus, and even updates the icon to show changes like the microphone status.

This is done with a Python script on the PC that monitors the running programs and updates the macro keeb accordingly using a serial protocol that [Sebastian] wrote. Thanks to the flexibility of this design, [Sebastian] can even use it to control the office light over MQTT and make the CO2 monitor send a color-coded warning to the jog wheel when there’s trouble in the air.

This project is wide open with fabulous documentation, and [Sebastian] is eager to see what improvements and alternative enclosure materials people come up with. Be sure to check out the walk-through/build video after the break.

Inspired to make your own, but want to start smaller? There are plenty to admire around here.

Continue reading “Dynamic Macro Keyboard Controls All The Things”

A Brief History Of Optical Communication

We live in the information age where access to the internet is considered a fundamental human right. Exercising this right does largely rely on the technological advances made in optical communication. Using light to send information has a long history: from ancient Greece, through Claude Chappe’s semaphore towers and Alexander Graham Bell’s photophone, to fiber optic networks and future satellite internet constellations currently developed by tech giants.

Let’s dive a little bit deeper into the technologies that were used to spread information with the help of light throughout history. Continue reading “A Brief History Of Optical Communication”

Coding A Dynamic Menu For Character LCDs On Arduino

These days, there’s a huge variety of screens on the market for use with microcontrollers. OLEDs and graphic LCDs abound, while e-ink devices tempt the user with their clean look and low energy consumption. However, for many purposes, the humble HD44780 character LCD does the job just fine. If you’re using such a device, you might want to implement a simple menu system, and in that case, [MyHomeThings] has you covered.

The menu code is simple to modify and implement. It allows the user to define a certain number of menu items, along with button labels and functions to be executed with button presses. By default, it’s set up to work with  left and right function buttons, with up and down buttons to toggle through the menu’s various entries. This suits the commonly available Arduino shields which combine a 16×2 character LCD with a set of four tactile buttons in a cross formation. However, modifying the code to use an alternate button scheme would be simple for those eager to tweak things to their liking.

For the absolute beginner to programming, it’s a great way to put together a simple interface for your microcontroller projects. It’s the sort of thing you might use if you’d built a do-everything Arduino handheld device, as we’ve seen built before. If you find text menus too archaic for your purposes, though, be sure to sound off with your favourite solutions in the comments.